Monday, June 20, 2016

What I Learned in 5 Weeks

Five weeks ago, I logged into the Make Art That Sells: Creating Collections for Home Décor classroom to learn what would be my first assignment from Lilla Rogers and her co-teacher, Margo Tantau. I had discussed this new challenge with my family. I warned them I was on a crash course, determined to learn more about the facets of art and design I admired while shopping in my favorite stores. Could my art be on a plate? Could my art be printed on fabric to make an apron, or bedspread, or curtains? This was something daring and different. I have spent years as a graphic artist using clip art that someone else designed. Now, the possibilities were exciting, and I anxiously entered this new world created by art agent and fairy art mother, Lilla Rogers.


Here is what I learned:

Although I don't consider myself an illustrator, I invested in a set of fine tip Micron pens and a pad of marker paper, and began to illustrate for the first time since college (that's over 20 years ago, my friends). I scanned in my work and translated it into vector art in Adobe Illustrator. For people who don't know what vector art is: I would say it's a tedious process of turning line art into shapes that can be filled with color.

Those feathers, florals and butterfly wings were pen strokes that had to be converted into solid fields on the computer screen, then assigned colors. I did that!!

I created icons using a variety of methods. Watercolor:


Brush pen:

That's delphinium and different brushstroke flowers that I made into a pattern. I did that!!!

Hand lettering, to be used as a graphic element:


And even a wooden chopstick, dipped in ink:
That wasn't actually an assignment; I was just experimenting with different line qualities. The blueberry and leaf shapes, though, ended up being designed into a carved wooden base of a lamp, for my final project.

The class was over the top -- in the kind of way you imagined walking into Wonka's Chocolate Factory when you were a kid, if it were a real thing. I'm in denial or going through withdrawal, without my Monday assignment. It would be crazy-making to keep up the pace, but there are so many techniques, so many substrates to design for, so many ideas that I could easily continue working. My portfolio would be amazing. But without the camaraderie of the other artists, and the fabulous instructors to nudge us along, life will now slow to a more manageable pace. Phew, I'm ready for that!

I learned that challenges are wonderful, but they also have a dark side for a slightly competitive personality like me. There's a fine line between admiring and supporting, and then letting your mind go to the "I'll never aspire to that level of work" internal conversation. I have to keep reminding myself that I'm new to this; I need to rack up many more hours of art to land upon a recognizable style, and be in that crowd. But, I'm not far from having the confidence to show my newfound commercial art skills to potential buyers.

Heartfelt gratitude goes out to Lilla and Margo. To say they are supportive is an understatement. I give them credit for wanting to teach what they know and bring new artists into the fold. If you are interested in learning more, go to makeartthatsells.com and browse the juicy creativeness.


Tuesday, June 14, 2016

Creating a Series

This spring, I accepted the challenge of making a series of art pieces as part of an online class, "Y is for Yellow!" with Carla Sonheim.


What makes several pieces of art hang together as a series? I suppose it would be that they were created on the same substrate, using the same art supplies, spanning similar subject matter, maybe with similar color treatment? This was a first time endeavor. What did I know about it?

I set the following parameters for the series:
   1. Pieces would be on same size wood panels
   2. They would all start out with collage
   3. I would work from live subjects, not photographs
   4. Medium of choice: acrylic paint

The first step was to prepare the panels with collage elements and set them to dry overnight. When I went searching for my subjects, I was delighted to find an arrangement with bright orange ranunculus at a local grocery store, and a potted gerber daisy.


At this point, I decided the collages needed more unifying, so I swiped them irregularly with a sage green and off white house paint. I was careful to allow attractive collage elements to show through the paint. Then I set about sketching the composition, and bringing the flowers to life.

The first two paintings settled in nicely. As finishing elements, and another unifying technique, I added subtle bits of color through stencils, and sketched over the top with a charcoal pencil to add details.

This is my favorite part of the whole first two paintings:


A week went by, and I went in search of more subjects. Oh my gosh, I found the most spectacular peonies! (At this time, it would be a good month or more before peonies would bloom in my yard).


I knew it would be a challenge to capture their beauty. See all those petals? I reminded myself that one of the reasons I was working from LIVE subjects was to see the light and shadows, and all the wonderful textures that cannot be captured in a snapshot reference. And here was the challenge: during the time I was working in my studio, the peonies kept opening up...... larger. And LARGER. What were once buds opened to full fledged blooms. As I painted I had to be more creative to depict these ever-changing glories.

But you know what was an even bigger challenge? The dang Irises. My fourth and final subject was a real scoundrel. Those flowers are very, very difficult to capture a likeness of. However, when I shared my work on social media, as I often do while working in the studio, the Irises garnered the most attention. Go figure.

The series is displayed in my studio for now, as I decide if I will have them framed or simply hang and enjoy. My first reaction to them all arranged in a group was that I wasn't sure they worked as a 'series' because of the difference color, which was a little jarring. Some bold and bright, some muted and pastel. I suppose I could have taken artistic license and painted them in a color scheme that was more cohesive. But for my first effort creating a series, I was happy in the end that I stayed true to the natural beauty of the flowers.

Each time I paint I learn new things. I hope I never stop learning; never stop being filled with wonder of the process, of the experiences.

Sunday, May 1, 2016

A New Challenge

Have you ever walked into a store and seen products for your home and thought, "That's an awful color," or "That's a horrible design?" Me too. All the time.

So I decided to take my 15 or so years of graphic design experience and learn about new and different commercial design applications. Like fabrics. Or holiday wrapping paper. Spoonflower caught my eye, big time -- I even bought their book, The Spoonflower Handbook: A DIY Guide to Designing Fabric, Wallpaper & Gift Wrap. Yummy fabrics, $5 swatches, eco-friendly printing.... I am crushing on this website and sometimes stalking it, which is weird, because I don't sew. But I do, from time to time, collage fabrics into a painting. How cool would it be to say that the fabric in the background of my piece is also of MY DESIGN? Or that the gifts I give on special occasions are wrapped in papers I crafted and then had professionally printed?

I've designed and cut my own stencils before, and that's a lot like creating a pattern. Except for those darn repeat patterns. Oh, hell -- that's gotta be hard, I thought. Until I enrolled in Lila Rogers' Make Art That Sells professional development course. The self-paced "MATS A" covers bolt fabric, home decor, children's books, wall art and the gift market. Crash course! I wanted to absorb it all, all at once.

My first pattern was nothing to get excited about:


It was made by taking a bunch of gauche paintbrush strokes and pen-and-ink lines, scanning them in, and playing with composition. All I wanted to accomplish was learning the repeat pattern process, and at this point, say "I did it!"

Since that first pattern, I've approached more designs as being a reflection of who I am as a mixed media artist. I thought about all the different processes I use when I make art. Why shouldn't my patterns be an extension of my own experience? Sometimes I sketch, or outline with pen, or create with a brush in all types of media from watercolor to ink to acrylics. Sometimes I make monoprints. I've even tried carving my own stamps. The pattern below right is made by using my own stamps and acrylic ink. I stamped a bunch of random images and colors, then scanned them in, did a little clean up and moved them around until I made a pattern I liked.


It's quite fun to see them come together. Now I carry a sketchbook wherever I go, doodling little clips and imagery when inspiration strikes. The good ones I convert to an ink drawing to be scanned and composed on the computer. Like a good chef in the kitchen, nothing goes to waste.

Then I heard about a company in the UK that does sort of a print-on-demand business model. They have a design competition to put art on a cushion (think 'throw pillow').  I entered three designs; here's what they look like:


Is that cool, or is that COOL?? The contest runs through May 8th, and here's how it works:

  • A FB and Instagram like = 1 point. 
  • A Cushion sale = 20 points.
  • Based on points, a short list will be sent to 20 industry judges. 
If you're so inclined, please visit http://www.wraptious.com/collections/competition-page (my designs are currently on the 4th page of entries) and share/vote/order away.


Meanwhile, I'll just be here, designing more patterns. I hear they start looking at holiday patterns in April.... Ho, ho, ho!

Wednesday, January 6, 2016

I went missing from this blog. For like a whole year.

Since it's the beginning of a new year, and also my birthday, I thought now was as good a time as ever to get back into composing some words.

Here is what's new:

I opened Periwinkle Art Studio. Here is a link to the website.

I was an active participant in teaching, and learning (via online classes and a super art retreat in August).

In 2016, I hope to pull a lot of loose strings together, and be more present on the blog!


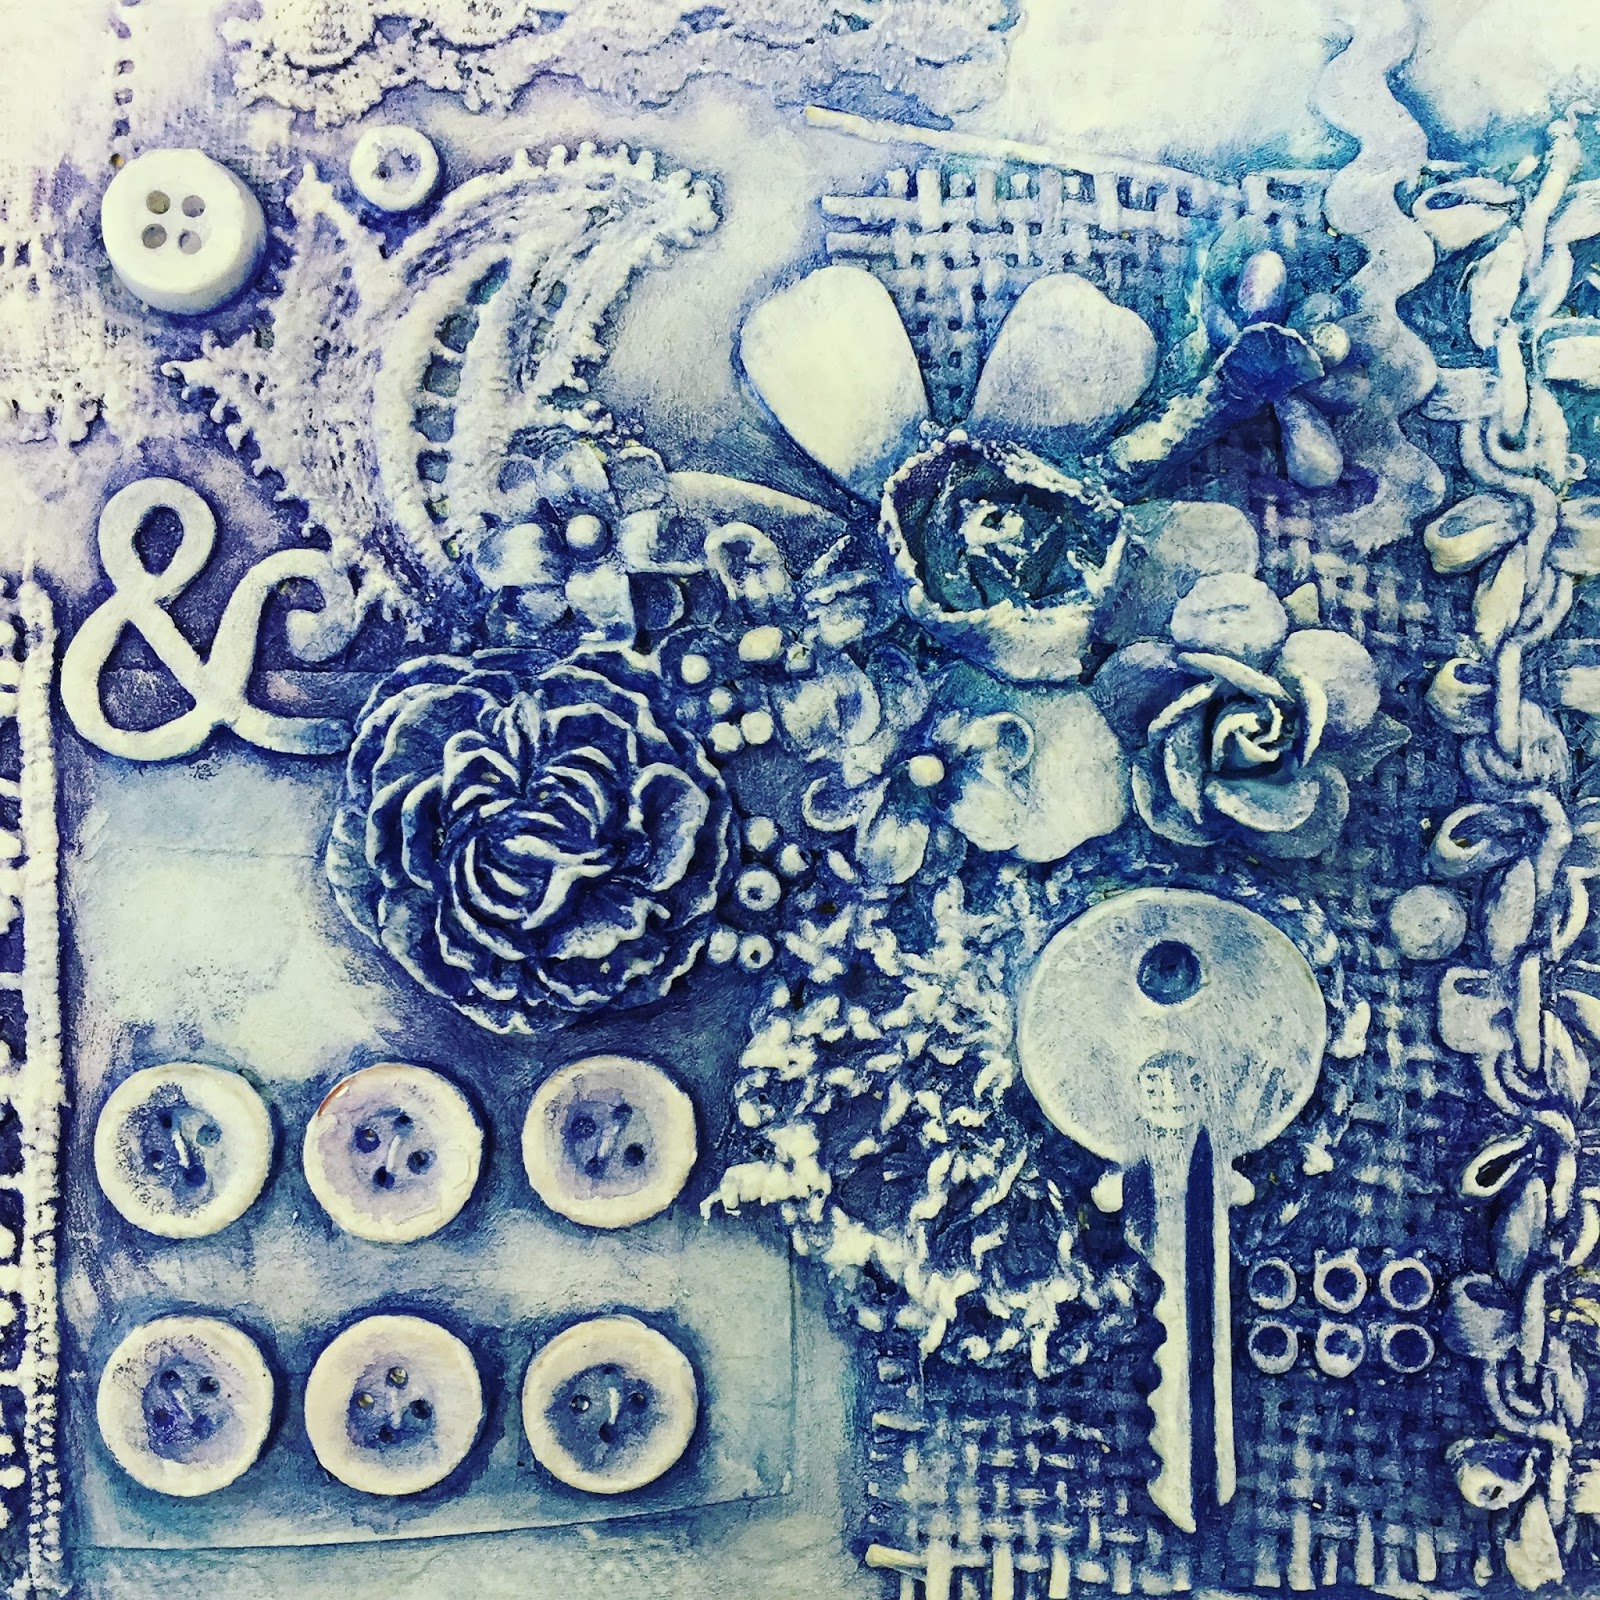
(This is a monochromatic collage experiment in which I thought I was paying homage to one of the Pantone Colors of the Year, 'Serenity'. But I think it ended up being..... Periwinkle.) :)

Cheers to an artful 2016!

Sunday, October 5, 2014

Can I Do It?

On my art journey (re-launched a few years ago now), I have sought sources of information from a variety of teachers. I knew very quickly after picking up a paintbrush again after a couple of decades that the feeling of paint on my hands and working with acrylics fed a part of my creative soul. I wanted to explore all that medium could do when pushed to new limits. I started with very inexpensive supplies and added cautiously as new products were introduced to me.

I weave creative time in between a full schedule of full time work, appointments, child's homework, committee meetings.... well, sometimes it's only once a week and I'm operating on fumes, but I'll take it. Any way I can get it. When the opportunity to join in a new class hits my e-mail or tempts me on social media, I'm hooked. More is MORE, right? Ha. Ha.

But it's been these temptations that have enriched my art abilities and stretched my mind to uncharted territory.

This gal really has no business nosing around two new online art classes at the moment. Holidays are coming (vendor shows! Need inventory!) No matter. I can juggle. But I'll let you in on a little secret: it's with a great deal of anxiety I enrolled in Effy Wild's "Radiant Faces" class on a whim, the day the class launched. Faces?! Who am I kidding.

Since I'm getting be a veteran of online courses, there were several traits very attractive about Effy's class: 1.) phenomenal price for instruction by artists I adore, 2.) the entire course content available all at once to "pick and choose" which video I could watch given my available time - no handholding or pressure, and... 3.) I knew I would be pushing myself. I have not done anything that looks like a portrait in over 20 years. 30, maybe.

Here's part of the genius of this course: it kicks off with luscious work by Jane Davenport. Oh. My. Goodness. Dive right in.

Then there's Dina Wakely. Christy Tomlinson. Tamara Laporte. Need I say more?

So I'm giving it a shot. Getting over the anxiety.

In August, I attended a few workshops at CREATE Mixed Media Retreat in Chicago. It's an easy drive for art immersion. Two of the classes spoke to my normal mixed media repertoire while the last class was "In Your Face" by Karen O'Brien. If you look at her work, it's mystical, youthful, almost from a fantasy of childhood dreams. There were certainly illustrators of children's books I had as a girl that I can close my eyes and see in fine detail, and I felt a little pull to see if I could create something like that.

Challenges.

These are rough faces from memory using an ink dropper on paper scraps. To loosen us up. The ink I brought in my supply stash turned out not to be waterproof as it said on the bottle, so the next layer was mud. Not pretty. I won't show you those. I had other instances of supplies not working with me that day, so I returned home exhausted but hopeful for another attempt someday soon.

A few days later, my son was painting huge watercolor flowers at the kitchen table and became frustrated when one of the blooms didn't come together like he wanted. I explained that everything takes practice. Then I pulled out my example faces and showed him what I was talking about. He laughed. Giggled. Guffawed. Yes, we all start somewhere.

So I finished one of my class attempts and decided there would be many, many, many more hours of practice ahead.

The critic in me is all over this particular image with thoughts on proportion, highlights, shadow, line, etc., etc. 

This morning I watched the Radiant Faces installment by Dina Wakley and she's a scribble girl after my own heart. It's phenomenal what she can get deli paper, colors and pencil to do.... I have a few of her new paint colors calling to me. I'm gonna experiment with her style and see if I can get closer to something my sensibilities can embrace.

Can I do it?!?

Stay tuned.

Oh, and by the way, my other online class that launches TOMORROW is Jenni Horne's "Paint Something." Yes. The paint will be flying this week.

Sunday, February 16, 2014

It Is A Long, Cold Winter

Yes, it's been a while since I've blogged.

Here's an update on what has been going on:

I have spent lots of time creating art and learning new mixed media techniques.


It's interesting and fun. It's color play.  It's wild.  And I love it.

I've experimented with acrylic paint, watercolors, pan pastels, tissue papers and lace, gel medium, spray inks and stencils. And more often than not, the background layers are the most exciting part of the whole process for me.


I've collaged background layers with handmade papers and bits of old book papers.


I've learned that overlapping shapes unify the overall design.


Sometimes the background layers are so truly amazing, I'm stumped as to where to go next....
(This is a much darker color scheme than I'm used to. I'm still waiting to be inspired about the main focal image on this canvas.)


A bit of this, a scrap of that, a swipe of the brightest color I can find


So,....... what's next?

Monday, September 3, 2012

Summer..... ah, summer

It was a long, hot summer.

It was full.  Full of painting and creating, keeping the garden watered and trying to keep a 7-year-old entertained when he wasn't in summer camp and I wasn't working.

The first sunflower bloomed in the garden in July.


These golden beauties were the inspiration of a lot of my canvases this summer. 

Meanwhile the garden has been a handful (as always), bursting forth with cucumbers and zucchini.... and -- anyone know what this is?


I'm venturing a guess that it will maybe turn yellow and it's the spaghetti squash I planted. But nothing surprises me out there. I have other mystery squash that have created their own breed and scare me a little. They are orange and bumpy. I'm not gutsy enough yet to cut them open, so I'm leaving them until I need something for a fall table decoration that doubles as a conversation piece. There are also green peppers (the best plants I've grown of that type. Ever.) And the tomatoes are slow to turn this summer.  Unless they are ripening, and my little chipmunk* inhabitants are scurrying away with them.  

*They will be relocated.  Soon.


My paintbrushes have fashioned all types of flowers this summer.  From very realistic to folksy to representational abstracts.  I had the opportunity to explain this during my very first painting class I taught on a Friday night in August.  It was a "Girls Night Out" BYOB concept and fun as hell!  And the time flew by... I'm looking forward to doing more.

I received a book as a gift on multi-media background techniques, which I have started to experiment with.  This technique is called "Scribing."


You expose parts of an underlying color by scratching the surface paint away.  (That's a smashed metal button in the center of the flower, surrounded by a remnant of sheer ribbon.)  When I start out, I never know where I'll end up, but usually I like the end product.

Another high point of my summer was having some much needed landscaping done on the old flower bed outside my back door.  The whole thing had started to erode into the driveway and it was just an eyesore. But no longer! It has been filled in now with the most lovely hydrangea bushes... but before that: on a very hot day, after playing in the sprinkler outside, my son decided to put his mark on the new landscaping stones.


Ever feel the need to leave an impression, even if it's with sidewalk chalk?


 He left me 52 smileys in all (and one heart).


You never know what that boy will do with sidewalk chalk.  Usually it's forming racetracks or maps to new galaxies.

And who doesn't love to turn to Pinterest for inspiration?

I have spent countless hours learning about new art techniques and crafts and DIYing and luscious food (gawd, it makes me hungry!) So I decided to artsy up a couple plain t-shirts using a bleach pen and permanent markers faded with rubbing alcohol.  You know the pins I'm talking about?  Yep.


Glad I got that out of my system.  Moving on....

Hope you are finding lots to keep you inspired and things that make your soul smile!


Sunday, July 8, 2012

Caught You Bloomin'!

Spring-into-summer was a flurry of activity this year.  There was the usual rush to get the garden planted (my target is Memorial Day -- it rained so there was about a week delay while we waited for our ability to rototill).  Since we had such warm weather early in the spring, my perennial blooming favorites I usually see around the second week of June made an appearance early this year.

Wait!

STOP!!

Don't come and go while I'm looking the other direction!

Nanny's old fashioned roses.... one of the most delicate, recognizable scents on earth.
It all happened too fast.  Instead of having a few weeks to be surprised and delighted by the colors and textures, it was sort of a mash-up as the poor bloomers gave a confused performance.

While nature was busy on the outside, I was also bursting on the inside with ideas for new art canvases.  There were itty bitty canvases and 3"x5"s and 8"x10"s.  There were layers and layers of colors and brush strokes.  Sunflowers and wildflowers and zinnias and daisies with a few things to say.

"Be" itty bitty blooming canvas.
You know what happens when you water the flowers?

The same thing happens when you feed creativity, it seems.  Breeds more creativity, and yearning.  And decisions.  I could sleep..... or paint.  I could read a book, or watch an online video about learning a new mixed media technique I haven't tried yet.

Somewhere, sometime I will learn about balance.

The unabashed tiger lily.
Meanwhile, nature is so good.  I'm grateful for its reminders.  I was not going to plant pots this year because of my time crunch, but ......... nothing beats the shot of color that annuals provide.  They're so dang cheerful!  So I did it.  I caved in, blithely.

Annuals in pots, because I can't escape the color and like to move the pots around at whim.

The flowers are doing well under the care of my faithful waterers.  My helpers are generous with their time and eager participants, even in 104 degree weather and a drought that hit the midwest these past few weeks.

Dahlia:  fuchsia and purple on a turquoise backdrop.
I have turned my attention to a bit of artistic growth of my own this summer.  My challenge:  to paint larger canvases than I typically find comfortable.  There's a 12"x16" and a 10"x20" staring at me as I write this.  Blink.  Blink.

Just be patient.  I'm working up the nerve.
 

Saturday, February 25, 2012

"Be the best FOR the world"

I want to kick ass.  Doesn't everyone?  So this post caught my eye.  It attributes Facebook, and well, who doesn't love Facebook, but I think there are seeds of WON-DER-ful ideas here to get amped up and inspire your bad-ass self.

Click here to read "How to Kick Ass"

There are 11 points listed.  I would add, simply, "Approach everyone and everything with kindness."

How about you?  Anything to add?

Sunday, February 5, 2012

When You Absolutely, Positively, Need a Chocolate Birthday Cake by Tomorrow

Last Sunday evening, I set out to make a chocolate birthday cake.

Not just any chocolate cake.  It was a recipe for the signature three layer chocolate cake from Gibson's Restaurant.  It was published in a magazine in which my dear friend had several articles published in the same issue.  So I thought, "Wouldn't it be THE chocolate cake to brag about at his birthday?"

I studied the recipe, and the only part that worried me slightly was the last two phrases, which said, "pan and bake at 350 for about 25-30 minutes.  Frost with chocolate butter cream and serve."  The magazine did not include a recipe for chocolate butter cream.  But I have a kick-ass Hershey's frosting recipe, so that would do.  But there was the "pan and bake" part.  The photo clearly showed three luscious layers, so I used three 8-inch cake pans.  (I only have two 9-inch pans, so....  I improvised).

My son loves to act as my sous chef, and he knows his way around my KitchenAid mixer.  One pound of butter, five eggs, a whole heap of cocoa powder and cake flour later, I realized this recipe was probably meant for a restaurant kitchen with an industrial-sized mixer -- not a home kitchen like mine.  When adding the wet ingredients alternately with the dry ingredients, let's just say..... spatterage happens.  My son ducked and ran for cover.

The pans, admittedly, were filled a little more than I would normally feel comfortable with, but I was in the mood to just go for it.  I put the three layers in the oven and placed cookie sheets strategically on the rack underneath the layers, just in case there would be drips.

I watched periodically through the oven door.

The cake layers puffed up high on the sides like souffles, at first.  I was alright with this.  What happened next I was not prepared for.  I witnessed the mostly-crusted, cooked side of one of the layers break away under a flow of cake batter that took it over the side.  It flowed like lava pouring out of a volcano.  It kept going, and going, and going.  I watched in dismay as this process continued with the second, then the third cake pan.  It must have been 10 minutes or longer that I watched my science experiment unfold.  My son, who was passing by the kitchen, asked, "Mom, how long are you going to sit there and look through the oven door?"

"I've just never seen anything like this happen before," I replied.  (Please note that I am not what I consider to be a baking novice.)

The cake batter created stalagmites on the "drip pans" I had placed under them.  But the first drops had now started to burn -- and smoke -- so I had to switch them out before my smoke alarm was alerted.  All I could do now was hope the lava mudslide would end, and the layers could continue cooking through without the bottoms burning and becoming one with the pans.

What if the chocolate cake tasted horrid?

I cut a chunk off one of the stalagmites and offered it to my son.  He has watched too many cooking shows on TV, by the way.  As he tasted the sample, he said, "Chewy,.... sugary,....... tastes good."  I exhaled.  Then he said, "It's just not as..... TALL as I thought."  He was referring to the three layer, towering cake in the photo along with the recipe.

The layers eventually cooked to what I thought was the right consistency.  After some cooling time, I began the process of prying the cake layers out of the pans.  The first two were manageable with only a slight amount of damage that could be rescued by frosting.  The third layer didn't bake all the way through and about a third of it stuck to the pan.


My kitchen looked destroyed.  It looked like I somehow shredded the cake.  There were crumbs all over just about every surface.

The next morning I put together the surviving layers and produced what I think was a pretty darn good chocolate cake.


My plans for the remaining layer was a recipe from my Southern Living at Home days.  I used to make this Brownie Trifle for "death by chocolate" parties.  It involved soaking a pan of brownies in Kahlua, then crumbling them for a layer in the trifle.  Since I already had a chocolate cake layer in shambles, what did I have to lose?


Don't you just want to dive into those pillowy layers of pudding, whipped topping, and toffee bits?  Yep, I almost did.  For breakfast.

All is well that ends well.  For me, chocolate cake is good when it's moist, pure, and has just the right amount of crumb.  I like it to be firm, but not dry.  I have to say that the Gibson's recipe taught me several new lessons in baking.  But I'd say the recipe is a keeper.


Saturday, September 3, 2011

Just CREATE

Last Saturday on a sheer whim, I registered myself for a workshop at CREATE Mixed Media Retreat in Lisle. Never been. Always wanted to go. One workshop intrigued me. It was on enameling. I got to make an art jewelry pendant: a ruffly little disk with a nest and eggs in the middle. I managed to get through the three hour class without sticking wire through my fingers, or spilling anything, or burning myself on the kiln, or setting the hotel on fire with the blow torch.

The instructor, Jean Van Brederode, was a natural teacher and appreciator of art. This came through in her comments and observations during the evening. I learned that one of the beauties of enameling is the process of creating a shiny piece out of dust (glass particles, really) that can surprise and delight you as it cools. What you see isn't always what you get. But the end result could tickle your soul. And, as many students found, if you don't quite like it, you may recolor it and fire it again.


I chose a cobalt blue for the background color, but sprinkled in a little pink to see if I would achieve a sort of violet hue. Jean explained that since the particles are glass dust, they don't "mix" together in the kiln. Still, I wanted a little visual texture so I went for it.

The wire bird's nest started out to be a lighter brown. After the first firing, although Jean commented on how I achieved the robin's egg blue color very well on the little eggs, I couldn't just LEAVE IT ALONE..... I had to add a little more color. The second firing affected the brown in the nest, though, and it looks almost gray now. Well. All I can say is..... sometimes more is more. But sometimes it's better to just be happy with whatcha got.

After buffing some bumps out of the enamel pendant, adding a copper jump ring for hanging, and wiring on a little bird, the final step is the wire wrapping. We melted the end of the copper wire using a blow torch, which created a teardrop and a cool oxidation on the shiny copper finish. (I'm not sure that's the word, oxidation, so I hope you get the idea).


The workshop was just what I needed to kick me in the butt creatively. I was inspired by the new ideas and the stick-to-itiveness of my classmates to achieve the desired colors they wanted. Jean was very complimentary of everyone's work and marveled at the final products. Immediately I had the desire to play with more color combinations and copper sizes, and the wheels started turning in my brain..... "How can I do this without actually purchasing a kiln?" "If I went this direction, what kind of crazy cool flowers could I make?" "Maybe there's a co-op of artists in my area who get together and fire enamel, and I could join them?!"

For now, I'll just start a meager list for Santa Claus. If I finished the cluster of projects I already have started, I'd feel better about launching into enameling jewelry. Or, maybe the desire will overwhelm me and I'll be doing blog posts about firing a new color.

Meanwhile, click over to Jean's shop on Etsy, "Charmed I'm Sure," and take a gander.

Monday, August 29, 2011

Summertime

During the summer, my garden takes up lots of my spare time (hence, the delay since my last post). But home grown tomatoes are a necessity of life, and so it goes.

It was a crazy summer of weather, with a storm in July that knocked out power to much of our county for DAYS. After all the rain, which came in bursts, the weeds arrived in full vengeance. Turn my back for a week, maybe 10 days, and... HOLY @#(&%^&#!!!!! The buggers have taken over!

I am thankful for the help with watering the garden in between bursts of torrential rain. (My watering buddy is mostly my son, who likes to water but gets most of it on himself rather than the tomato plants). And now, it's harvest time.


...and there are more coming.........


I have a little rabbit who has been a visitor since the spring. I'm thinking he is the one who has sampled many tomatoes but decides each time it's not for his palate. He (if he is indeed the culprit) takes one big bite out of the ripest tomato and leaves it hanging there, forlorn.

I also have "volunteers" in the garden. These are stray seeds that managed to flourish from being rototilled into the soil and sprung forth, encouraged by the hot midday sun. I'm usually so curious to see what will be produced on the vine that I don't pull them like those darn weed invaders. This year I have some weird cross-pollination between a gourd and what I think is a yellow crookneck squash.


Could be that the yellow squash, if left alone, gets a hard exterior and BECOMES an ornamental gourd..... or it's just completely a mutant. Most of them have become a blazing orange color with a hard and bumpy exterior. They will be fun guests in Halloween and Thanksgiving décor. I also have mini pumpkins and the usual dill weed that came back this year.

But back to the tomatoes. After a few days of being preoccupied with other things, I surveyed the garden to see that there was about a half bushel of ripe tomatoes. Not just ripe, but bursting with juice and hanging there like overfilled water balloons. Some had even let loose and dropped to the earth before I could pick them.


An abundance of tomatoes leads to 27 versions of tomato salad, tomato pie, marinara sauce, BLTs, etc., etc., etc. One of the simplest ways to present tomatoes to the dinner table, right out of the garden, is layered with fresh buffalo mozzarella, drizzled with a good olive oil, and sprinkled with fresh basil, salt and pepper. (Sometimes I also use balsamic vinaigrette, but not this time.)

And then there are the low maintenance, lovely-to-see-you sunflowers.


So unassuming.

So cheerful.

So tall and stately.

I imagine they have little gossipy conversations about me behind my back.